In this article, we will provide a step-by-step guide for extending your VPS disk in Windows after it has been upgraded.
First of all, make sure that your VPS upgrade has been applied. Reach out to our Customer Care team via live chat for confirmation
Make sure you are connected to your VPS as well.
Now follow these steps:
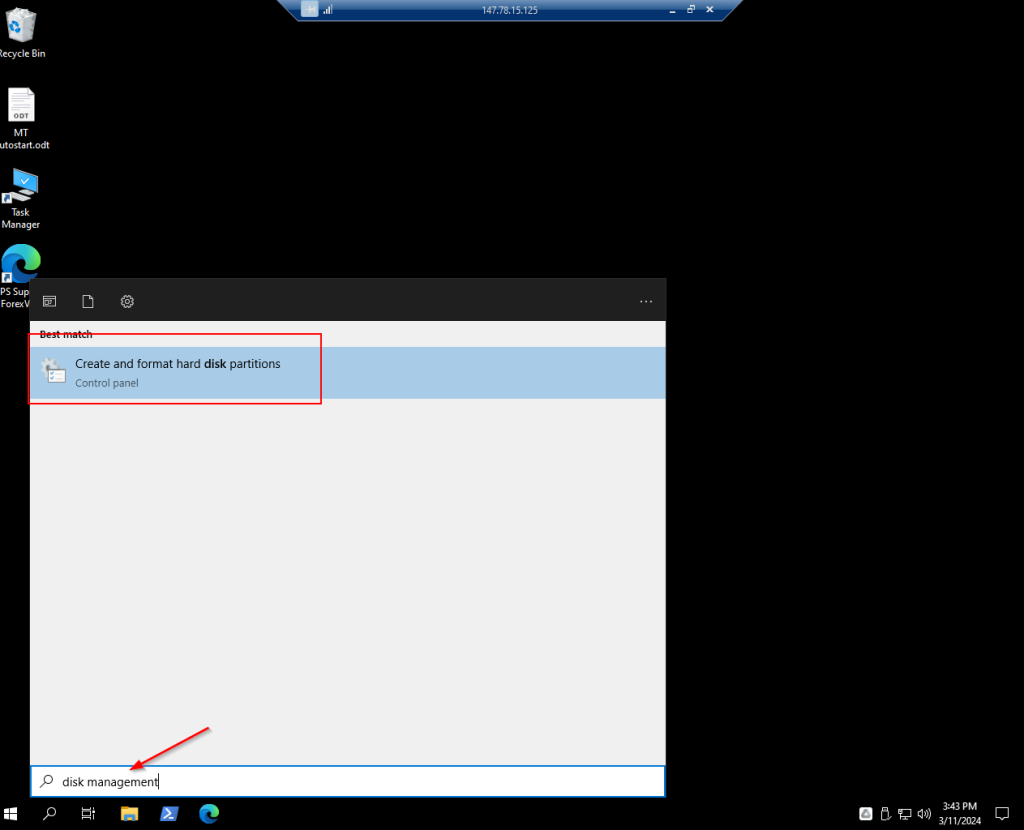
1. Click on the Windows start button on your taskbar and type “Disk Management.”
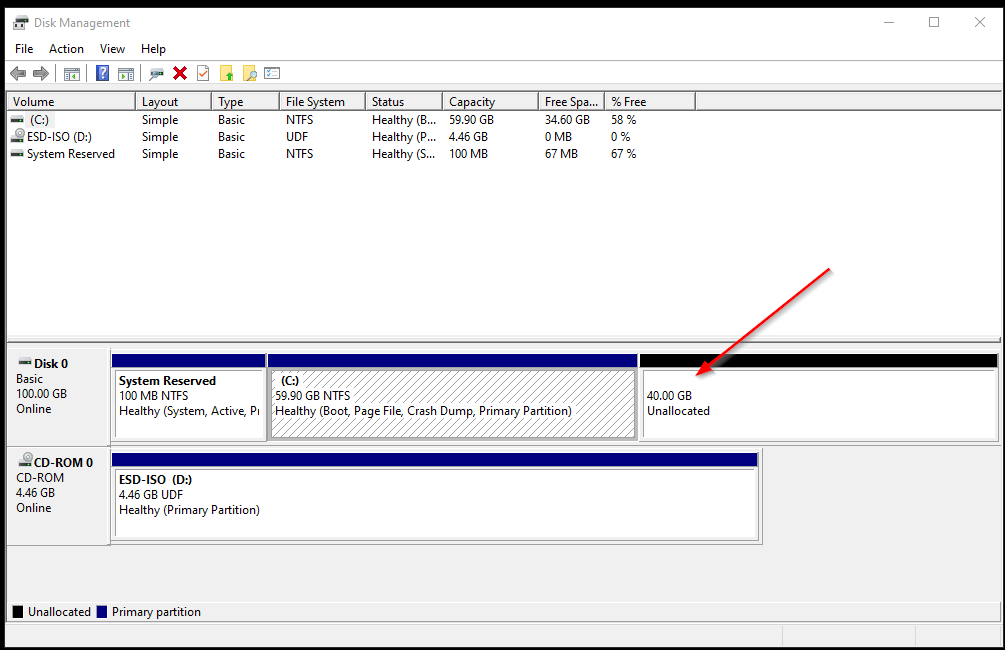
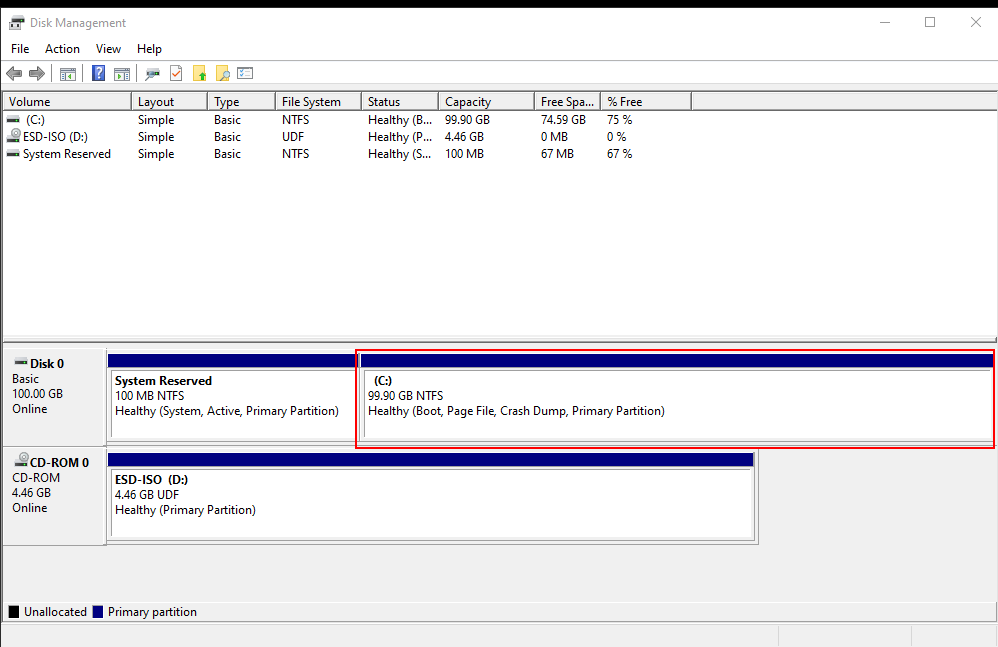
2. Open “Disk Management” and check the unallocated space on your VPS Disk 0.
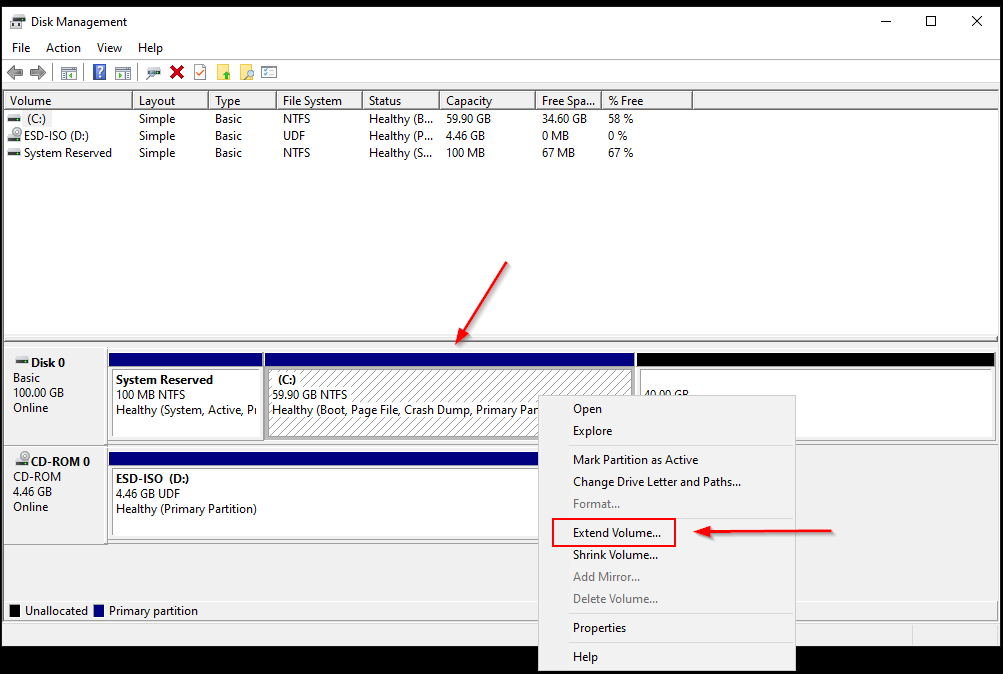
4. Right-click on the “C:” disk space and select “Extend Volume”.
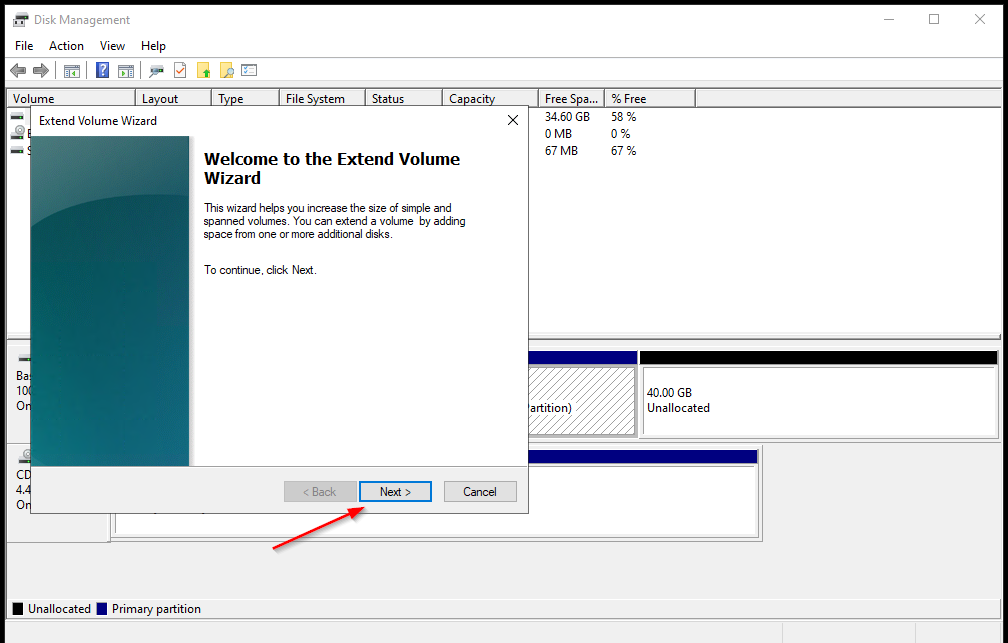
6. Select “Next” to both windows options popping up and then “Finish.”
7. You can now double-check your disk space under “This PC” and notice your Disk’s space.
Here is a video for further details:
If you need any further assistance, contact our Customer Care department via Live Chat or at support@forexvps.net.