Mac users connect to ForexVPS using Windows App — Microsoft’s official remote desktop client for macOS, available free on the App Store. This guide walks you through retrieving your ForexVPS credentials, installing the app, and connecting to your ForexVPS in under ten minutes.
Before you start: ForexVPS has a 15-minute provisioning period after purchase. Your ForexVPS credentials are sent to your registered email once provisioning completes. If you haven’t received them yet, wait out the provisioning window before continuing.
What you’ll need
- A ForexVPS account with an active VPS subscription
- A Mac running macOS (any recent version)
- Access to the App Store
- Your ForexVPS client area login or the VPS welcome email
Part 1: Find your ForexVPS credentials
Your Main IP, Port, Username, and Password are in the ForexVPS welcome email ForexVPS sends after provisioning. You can always retrieve them from the client area — no inbox required.
Step 1: Log in to the ForexVPS client area
Go to forexvps.net and click Login in the top navigation to open the client area.
Step 2: Enter your credentials and complete the captcha
Type your Email address and Password, complete the captcha, then click Login. This logs you into your ForexVPS account — not your ForexVPS itself.

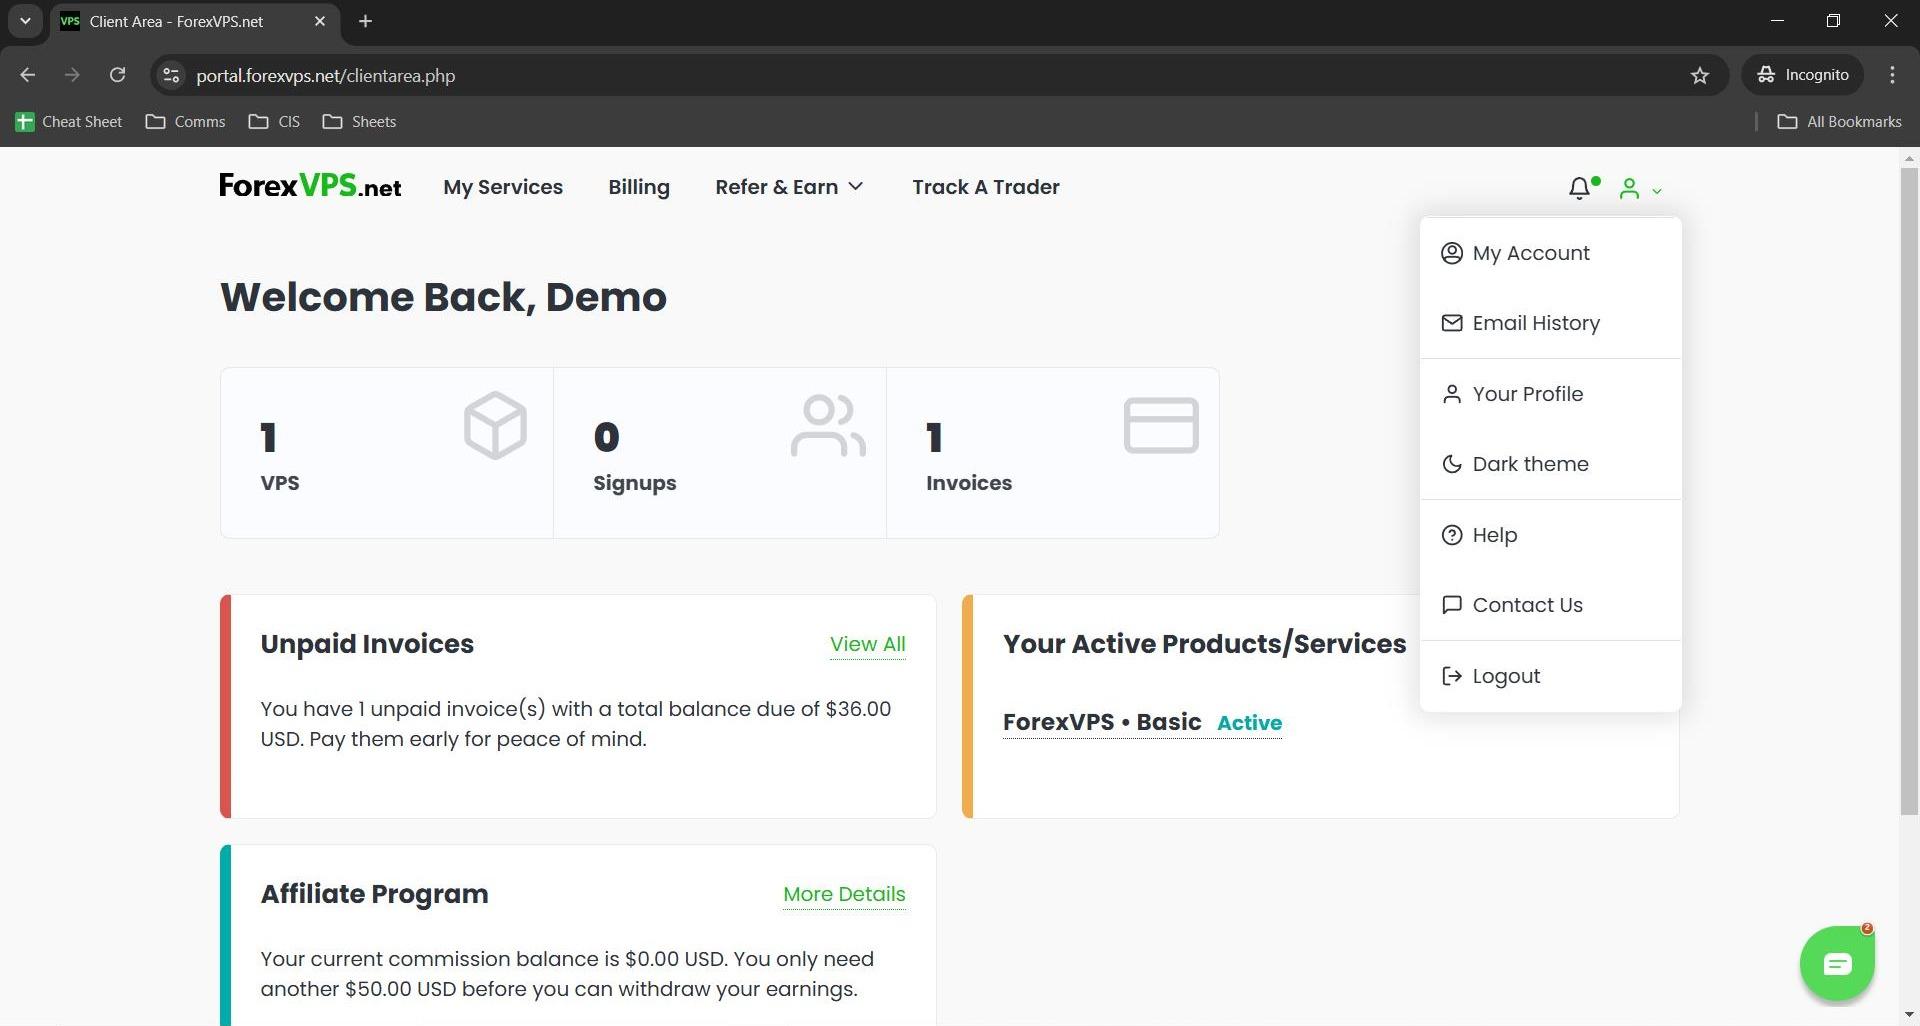
Step 3: Open your profile menu
Once logged in, click your profile icon in the top-right corner of the dashboard to open the account dropdown.
Step 4: Go to Email History
Click Email History from the dropdown. This section contains every system email ForexVPS has sent to your account — including your ForexVPS welcome email. It’s the most reliable place to find your credentials regardless of spam filters.
Step 5: Open your ForexVPS welcome email
Locate the ForexVPS welcome email in the list and click View Message. The full email with your server credentials opens directly in the browser.

Step 6: Note your ForexVPS login details
The email contains four values you need to connect. Keep this tab open or copy them before moving on — you’ll enter them into Windows App in the next section.

| Field | Description | Example |
|---|---|---|
| Main IP | Your ForexVPS server’s IP address | 123.456.78.90 |
| Port | The RDP port for your connection | 3389 |
| Username | Fixed for all ForexVPS plans | trader |
| Password | Unique to your ForexVPS instance | Alphanumeric string |
Part 2: Install Windows App on your Mac
Windows App is the official Microsoft remote desktop client for Mac. If you already have it installed, skip to Part 3.
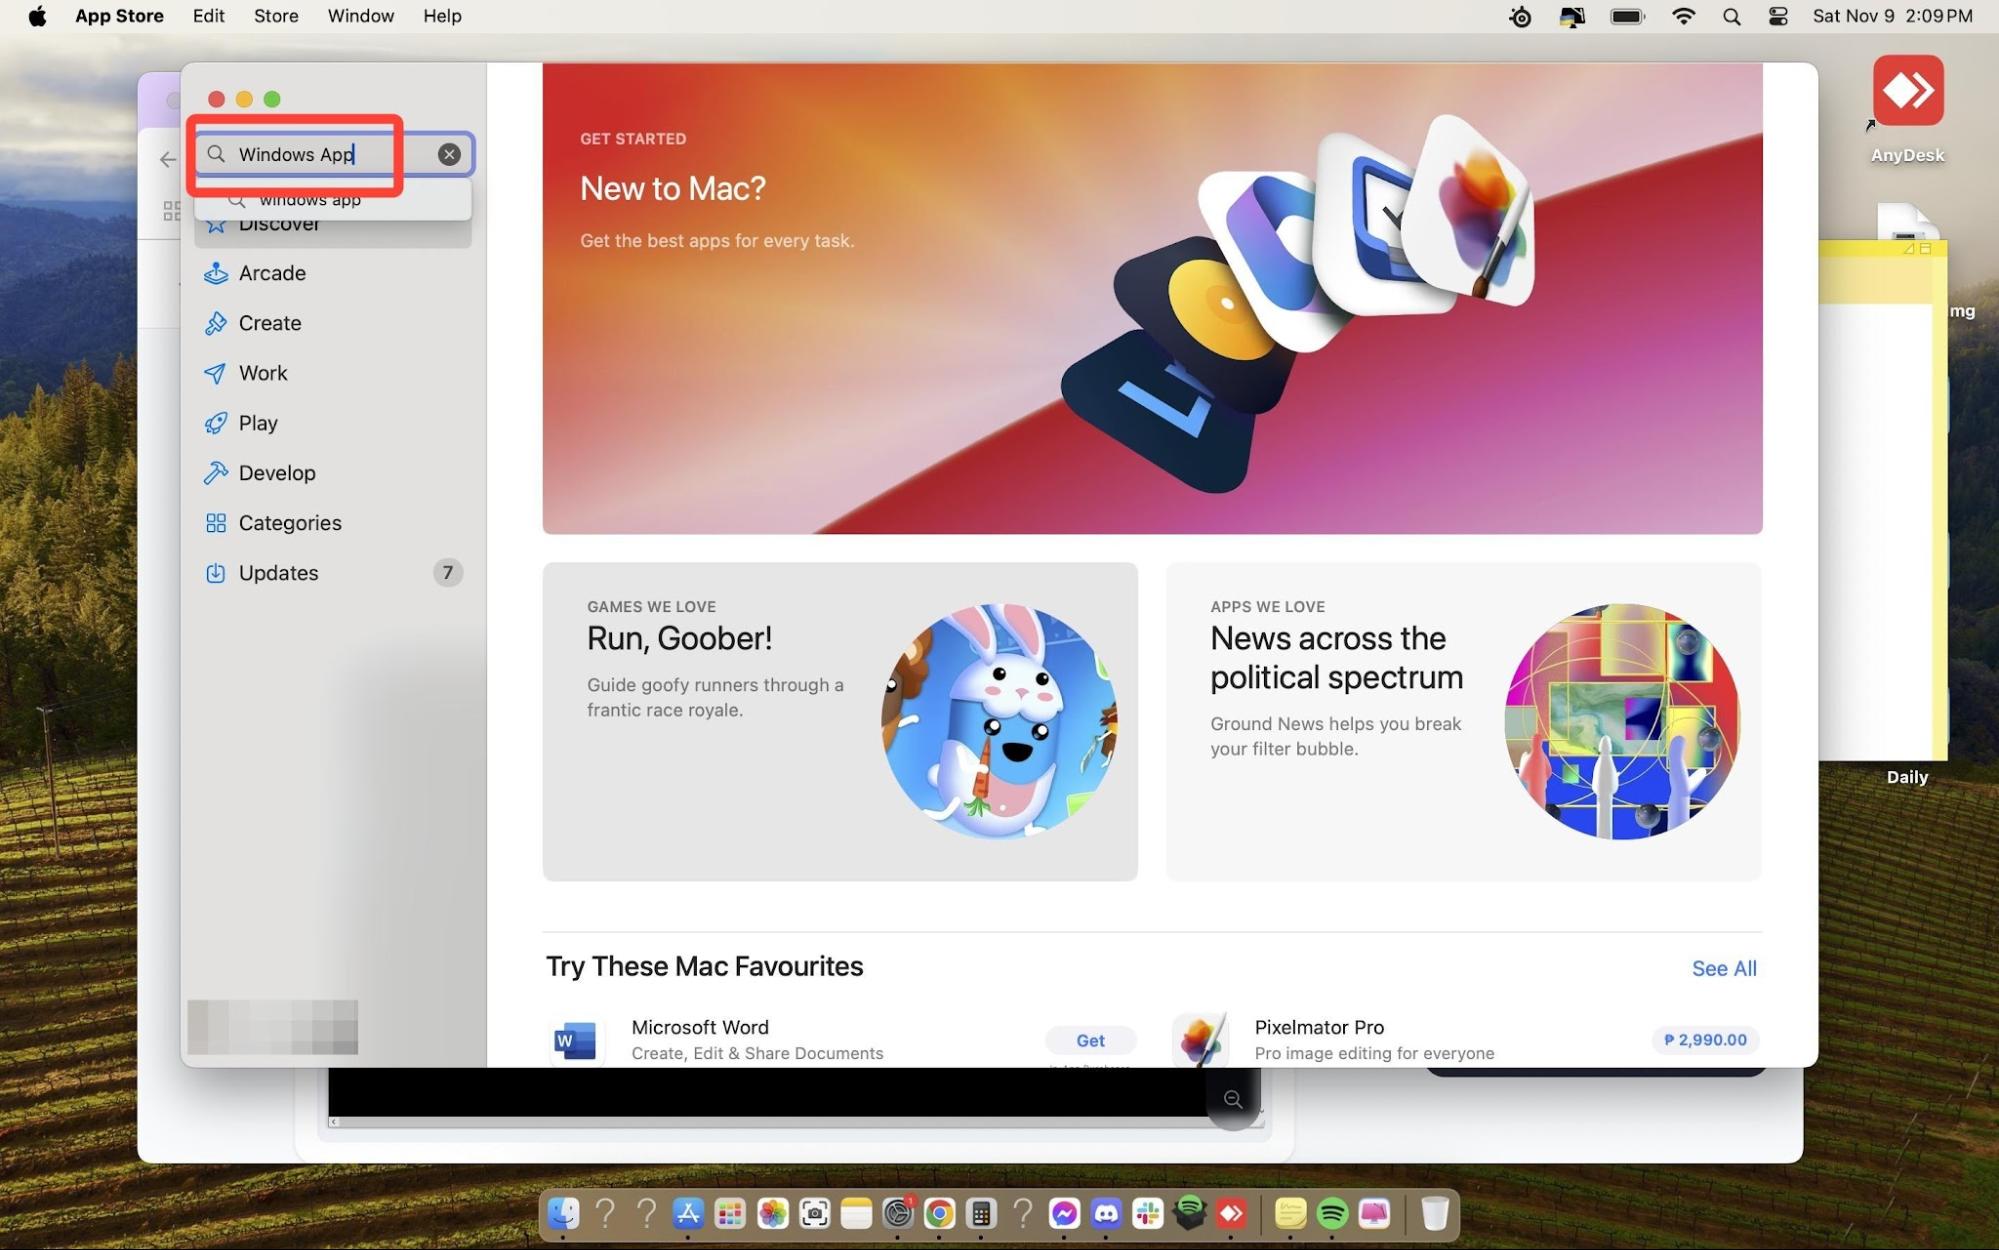
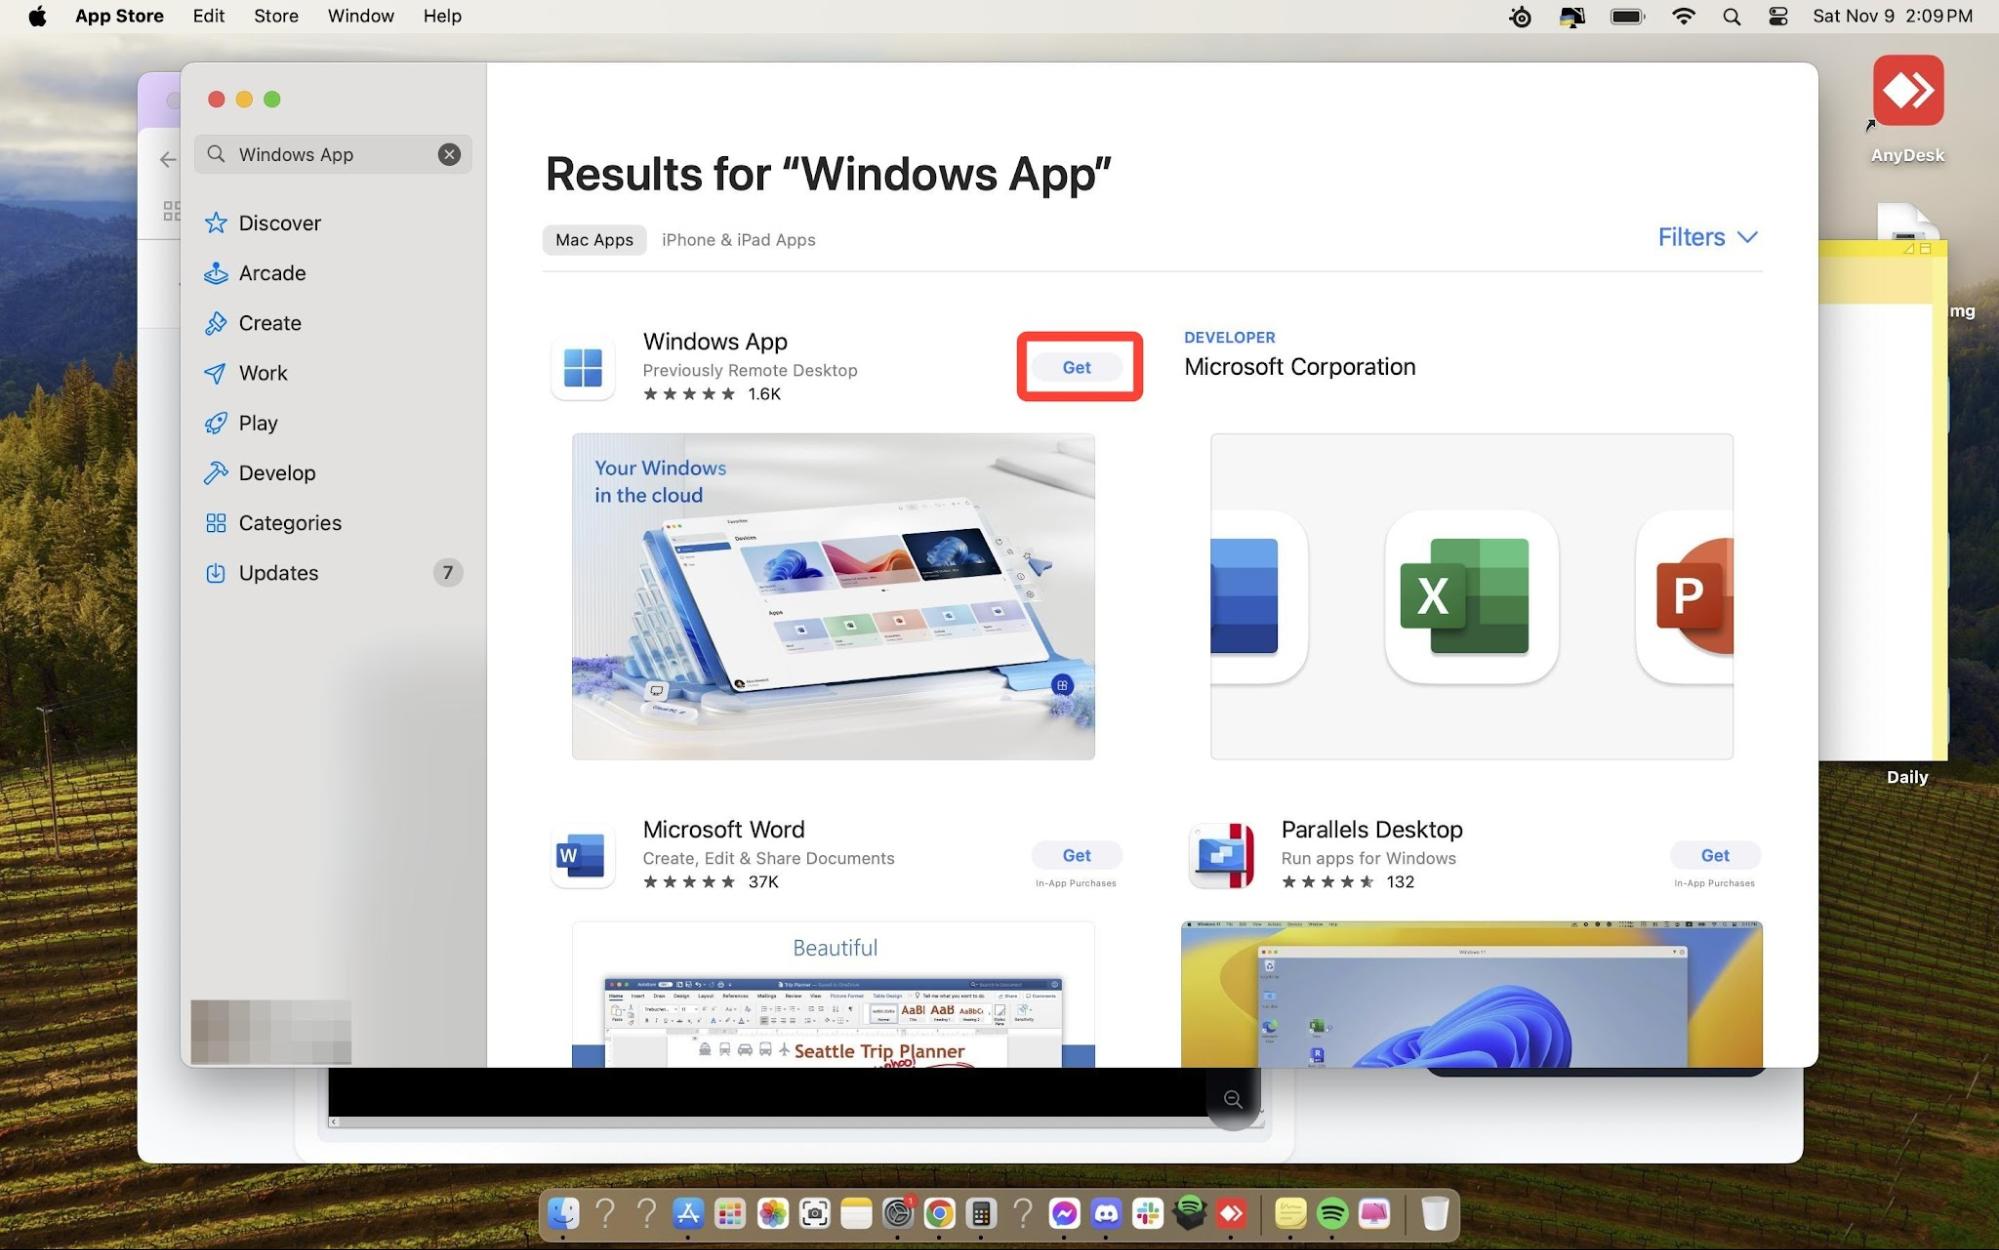
Step 7: Search for Windows App in the App Store
Open the App Store on your Mac and search for Windows App. The app is published by Microsoft Corporation.
Step 8: Install and open the Windows App
Click Get, then Install. Once the installation completes, click Open to launch the app. You may be prompted to sign in with a Microsoft account — you can skip this step if you only need to connect to your ForexVPS.
Part 3: Add your ForexVPS and connect
With the Windows App open and your credentials to hand, add your ForexVPS as a new PC and connect.
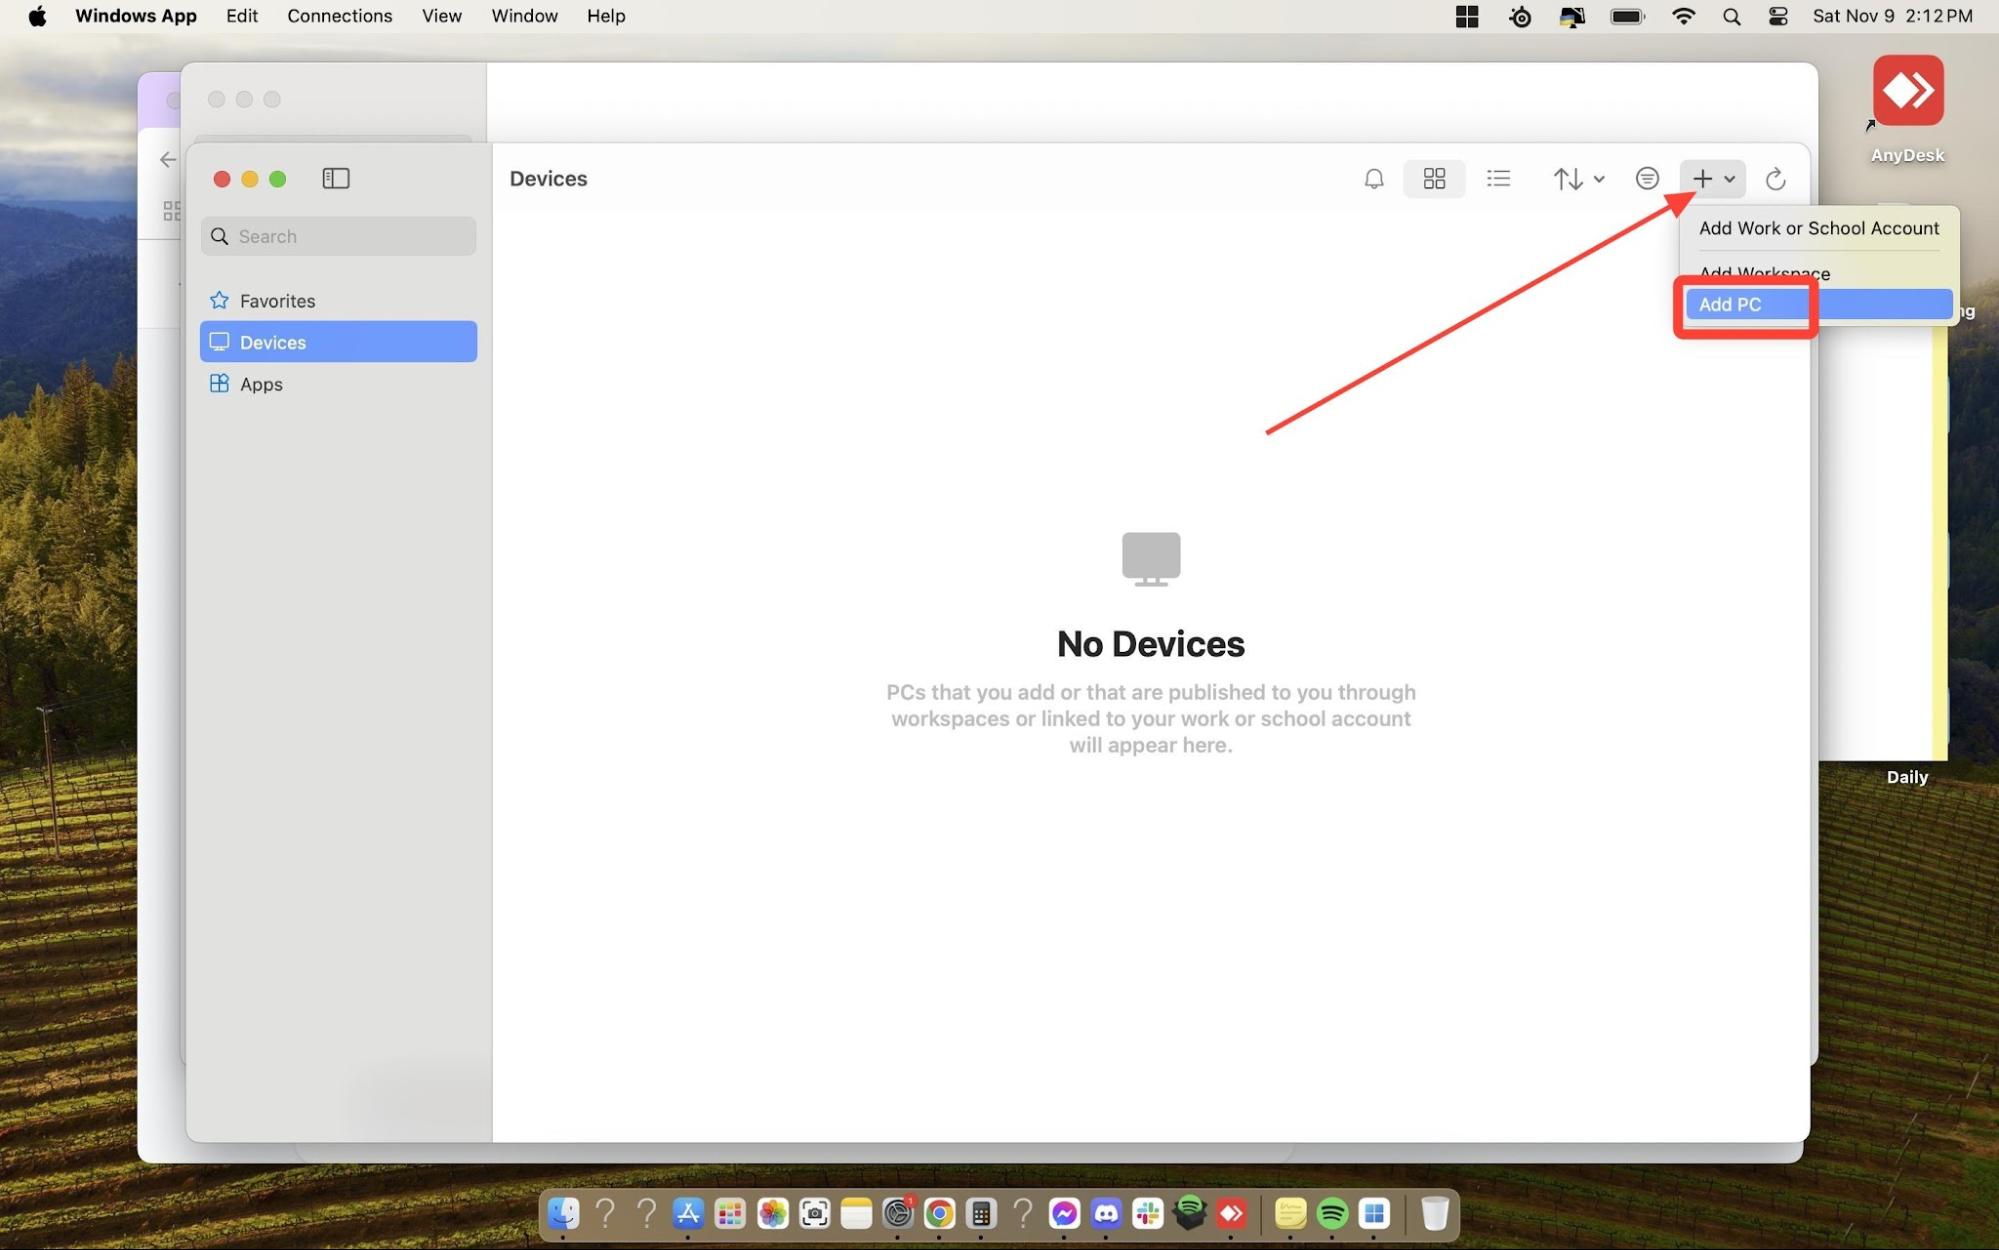
Step 9: Add a new PC connection
Click the + dropdown in the top-right corner of the Windows App window and select Add PC. The Add PC dialog opens.
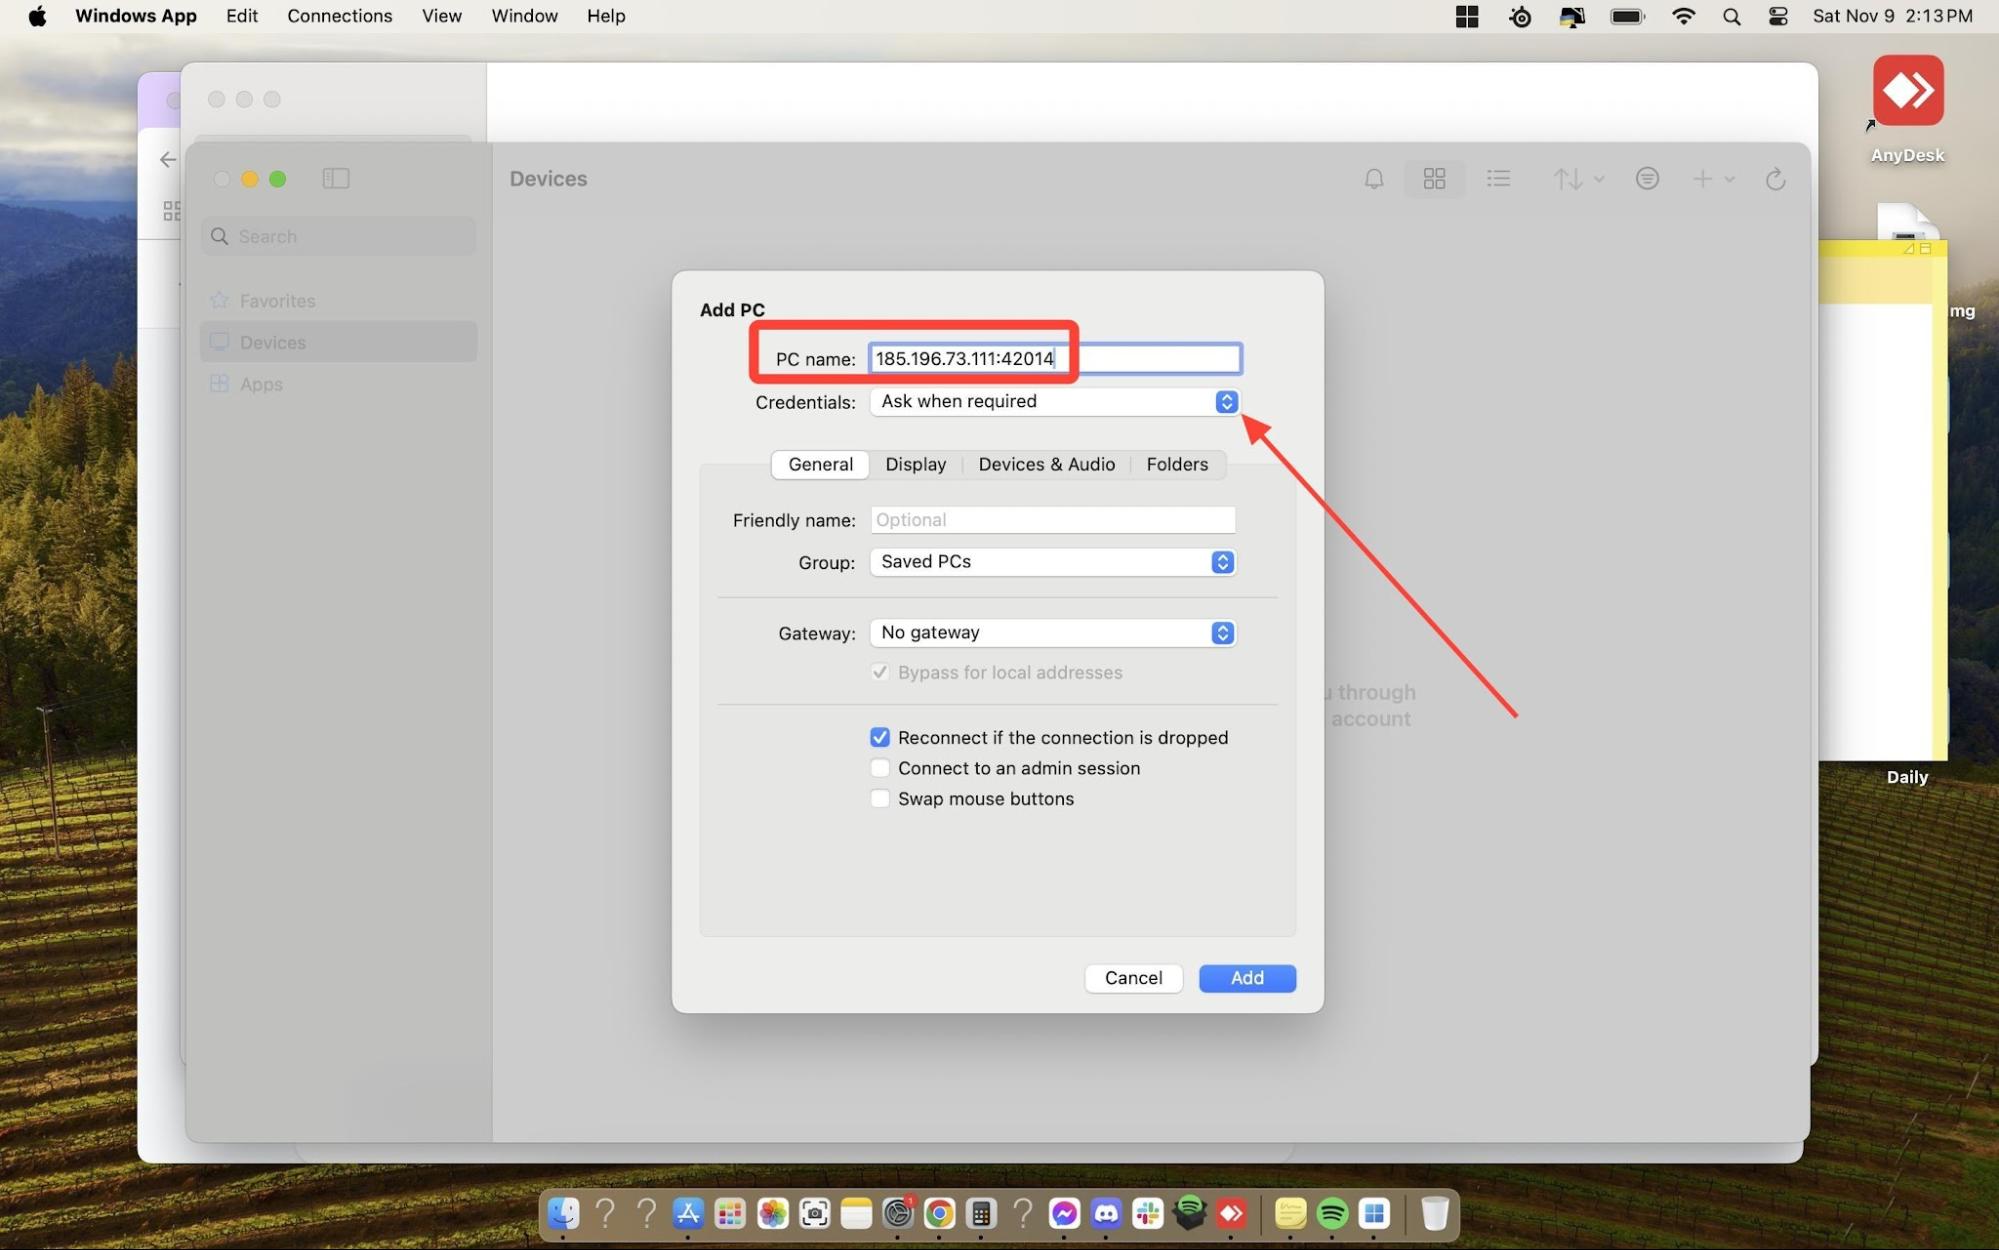
Step 10: Enter your ForexVPS address and add credentials
In the PC Name field, enter your Main IP and Port in the format IP:Port — for example, 123.456.78.90:3389. Then click the Credentials dropdown and select Add User Account. Enter the Username (trader) and your ForexVPS Password, then click Add. Click Add again to save the PC.
Your ForexVPS now appears as a tile in the Windows App workspace. Double-click it to connect. If a certificate warning appears, click Continue — this is expected for ForexVPS servers and does not indicate a security risk. Your ForexVPS desktop loads and your trading platform is ready to configure.
Troubleshooting Mac connection issues
If you’re having trouble connecting to your ForexVPS from a Mac, check these common fixes.
| Problem | Likely cause | Fix |
|---|---|---|
| Connection fails after entering PC name | Wrong IP:Port format or ForexVPS still provisioning | Verify the format is IP:Port with no spaces. Wait 15 minutes after purchase if newly provisioned. |
| Credentials rejected on login | Wrong username or password | Re-copy both values from Email History in the client area. The username is always trader. |
| Windows App not found in App Store | Searching with the old name | Search for Windows App (previously called Microsoft Remote Desktop). Publisher is Microsoft Corporation. |
| Certificate warning on connection | Self-signed certificate on your ForexVPS | Click Continue — this is normal for ForexVPS servers and safe to accept. |
Frequently asked questions about connecting to your ForexVPS on Mac
Still have questions about using Windows App from your Mac? Find quick answers below.
Is Windows App free for Mac?
Yes. The Windows App is free to download from the Mac App Store. It is published by Microsoft and requires no subscription to connect to your ForexVPS.
What do I enter in the PC Name field?
Enter your Main IP and Port in the format IP:Port — for example, 123.456.78.90:3389. Both values are in your ForexVPS welcome email under Profile > Email History.
What is the username for my ForexVPS?
The username is trader for all ForexVPS plans. The password is unique to your ForexVPS and is in the welcome email — copy-paste it to avoid typos.
Is Windows App the same as Microsoft Remote Desktop on Mac?
Yes. Microsoft rebranded Microsoft Remote Desktop as Windows App. The functionality is identical — if you already have Microsoft Remote Desktop installed, it will continue to work and may have updated itself to Windows App automatically.
Can I save the connection so I don’t have to re-enter details every time?
Yes. Once you add a PC to the Windows App, it is saved as a tile in your workspace. Double-click the tile any time to reconnect — your credentials are stored and you won’t be prompted again.